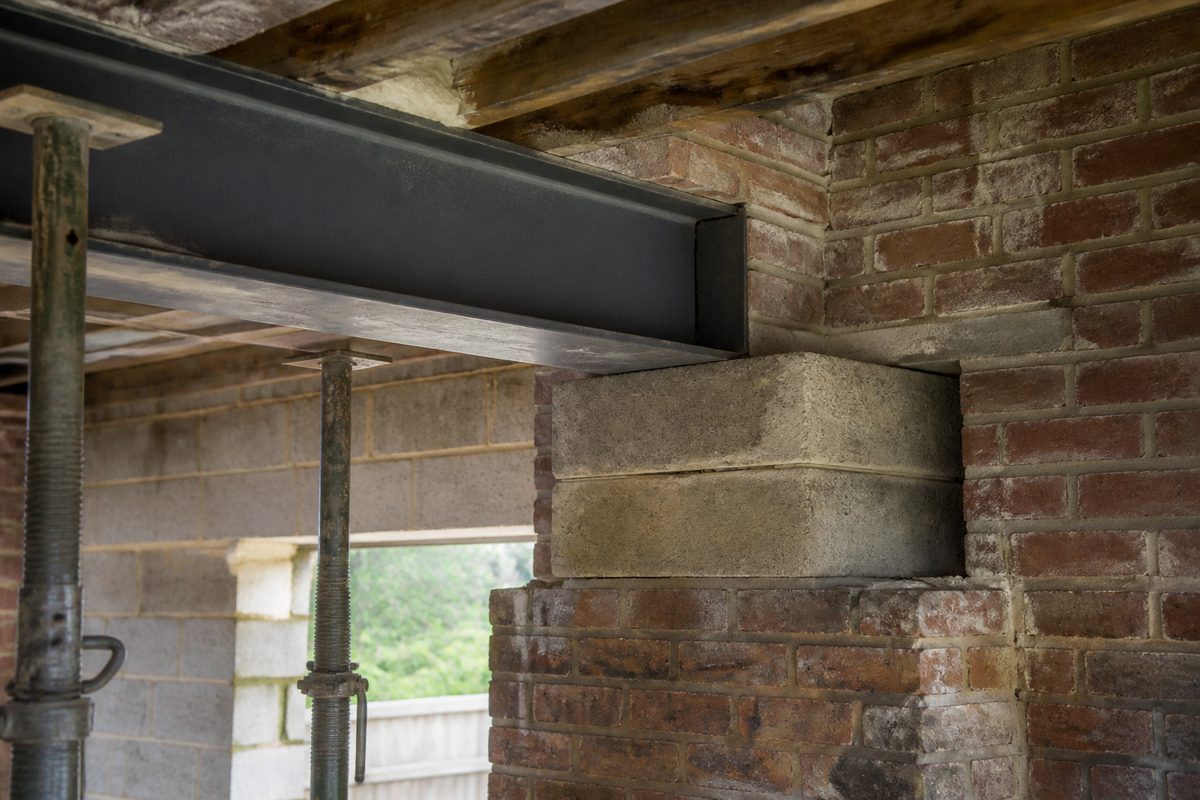
Padstones look boring until something goes wrong. Then you get crushed blockwork, a beam that has settled a few millimetres, cracked plaster upstairs, and a very expensive conversation with Building Control. This guide walks through worked examples so you can follow the engineer’s drawings instead of nodding politely when someone says “padstone”.
For a quick area check use the padstone calculator. The older long-form maths article still helps: padstone calculator for RSJ installations.
What a padstone actually does
An RSJ flange is small. The end reaction from a domestic floor beam is not. Masonry is weaker per square millimetre than steel. The padstone is the middleman: a dense concrete (or specified stone) block that spreads the load into a larger area of wall so the local bearing stress stays within safe limits.
It also gives you a level bed. Existing walls are rarely dead flat. Dropping a beam flange onto a random brick course is how people invent point loads they never designed for.
The simple sizing logic
- Find the end reaction (kN) from the engineer’s calcs — or, for rough planning on a simple UDL beam, total load ÷ 2.
- Pick a conservative allowable bearing for the masonry (N/mm²).
- Required area (mm²) ≈ reaction (N) ÷ allowable bearing.
- Choose a padstone that covers that area and covers the flange width with margin.
- Check depth against course heights and the drawing schedule.
That is planning arithmetic. The issued drawing still wins.
Masonry bearing — planning values
| Material | Conservative planning bearing |
|---|---|
| Soft / aerated block | 0.2–0.3 N/mm² |
| Standard concrete block (≈7N) | 0.3–0.5 N/mm² |
| Dense block / better brick | 0.5–0.7 N/mm² |
| Engineering brick local detail | higher — only if specified |
If you do not know the wall, assume the lower end and let the engineer upgrade or redesign. Old brickwork needs judgement on site, not a confident guess from a phone photo.
Worked example A — 4 m kitchen beam
Assume:
- Uniform load on beam ≈ 10 kN/m
- Clear span 4.0 m
- Total load ≈ 40 kN
- End reaction ≈ 20 kN each end
- Beam: planning talk around 203×133×25 (flange ~133 mm)
- Masonry allowable ≈ 0.4 N/mm²
Required area ≈ 20,000 N / 0.4 = 50,000 mm² → about 224 × 224 mm on paper.
In practice the schedule often shows something like 300 × 300, 440 × 215, or another merchant size that covers the flange with spare and matches course heights. Engineers rarely issue the mathematical minimum square.
Also add ~150 mm bearing length along the beam axis at each end when you think about how the steel sits — see the bearing length calculator and the 4 m span guide.
Worked example B — heavier 5 m opening
Assume end reaction 35 kN, same 0.4 N/mm² masonry.
Area ≈ 87,500 mm² → rough 300 × 300 minimum territory, often larger on the drawing once flange cover and cavity details are included.
At 5 m, temporary works and padstone levels matter more because the steel is heavier. Check mass with the weight calculator and sizing talk in the 5 m span guide.
Worked example C — soft block wall
Same 20 kN reaction, but aerated block at 0.25 N/mm².
Area ≈ 80,000 mm². Now you are looking at a bigger pad, local rebuilding in denser block, or a concrete spreader — whatever the engineer specifies. Do not “make do” with a small padstone because it fitted the hole.
Common UK padstone habits
- Precast dense concrete padstones from builders’ merchants
- Depth often 140–215 mm to suit block courses
- Length along the wall sometimes longer than the flange to catch both leaves of a cavity (detail dependent)
- Packing and non-shrink grout as specified — random slate stacks are not a system
- Fire stopping and finishes come later; the pad still has to be right on day one
Installation notes that save arguments
- Bed the padstone level before the beam arrives.
- Full bearing — no toe-only contact on the flange tip.
- Temporary props stay until the engineer / Building Control say otherwise.
- Do not confuse a padstone with a random concrete lintel on its side.
- If the drawing shows two pads per end (cavity / twin leaf details), buy two.
How padstones link to the rest of the job
| Step | Tool / guide |
|---|---|
| Pick planning beam size | Beam size calculator · span table |
| Order length | Bearing length calculator |
| Crane / handling | Weight calculator |
| Money | Install cost guide · cost calculator |
| Real project flow | Kitchen knock-through case study |
FAQ
Can I skip padstones on a short 3 m beam?
No. Short beams still dump serious reactions onto small areas. See the 3 m span guide.
Are plastic packers okay under the beam?
Only if the drawing allows a specific packing system. Improvised plastic and timber packs are a classic defect.
Who sizes the padstone — me or the engineer?
The engineer. You use this page to understand the drawing and spot when a quote forgot the pads entirely.
What if the existing wall is rubbish?
Expect local rebuilding, denser units, or a redesign of the bearing. That costs money and time — budget it early in install costs.
Buying checklist
- Exact dimensions from the drawing schedule
- Quantity per bearing (cavity details may need more than one)
- Strength/density class if specified
- Delivery timing before steel day
- Mortar / grout products named on the drawing
If the quote for �RSJ install� never mentions padstones, the quote is incomplete. Pair with kitchen case study to see how bearings show up on a real timeline.
Extra FAQ
Can I cast padstones in situ? Only if designed that way. Precast is common for speed and consistency.
What if courses do not match pad depth? The engineer adjusts � do not grind random bricks to �make it fit�.
Bottom line
If the drawing shows a padstone size, buy that size. If you are still at planning stage, use the examples above to understand the brief — then let the engineer set the marks. Soft blockwork without a proper pad is one of the easiest ways to turn a tidy knock-through into a structural mess.